Hey there, fellow motorcycle enthusiasts! Today, I'm stoked to share with you a step-by-step guide on how to install an aluminum oil cooler on your motorcycle. As an aluminum oil cooler supplier, I've seen firsthand the benefits these coolers bring to your bike, and I'm excited to help you get the most out of your ride.
Why Install an Aluminum Oil Cooler?
Before we dive into the installation process, let's quickly talk about why you might want to install an aluminum oil cooler on your motorcycle. Aluminum oil coolers are designed to help regulate the temperature of your engine oil, which is crucial for maintaining optimal engine performance. When your engine oil gets too hot, it can break down more quickly, lose its lubricating properties, and even cause damage to your engine. By installing an aluminum oil cooler, you can keep your engine oil at a more consistent temperature, which can help extend the life of your engine and improve its overall performance.
What You'll Need
Before you start the installation process, you'll need to gather a few tools and materials. Here's a list of what you'll need:
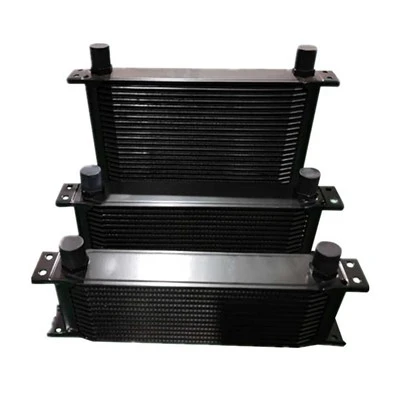
- Aluminum oil cooler: You can find a wide variety of aluminum oil coolers on the market, so make sure you choose one that's compatible with your motorcycle. Check out our Aluminum Radiator with Oil Cooler or High Performance Aluminum Engine Transmission 13 Row Oil Cooler For Mustang for some great options.
- Oil hoses: You'll need to purchase oil hoses that are the right length and diameter for your motorcycle and oil cooler. Make sure you choose high-quality hoses that are designed to withstand the high pressures and temperatures of your engine oil.
- Fittings: You'll need to purchase fittings that are compatible with your oil cooler, oil hoses, and motorcycle. Make sure you choose fittings that are made from high-quality materials and are designed to provide a secure and leak-free connection.
- Tools: You'll need a few basic tools to complete the installation process, including a socket set, wrenches, pliers, and a torque wrench. Make sure you have all the necessary tools on hand before you start the installation process.
Step-by-Step Installation Guide
Now that you have all the necessary tools and materials, it's time to start the installation process. Here's a step-by-step guide on how to install an aluminum oil cooler on your motorcycle:
Step 1: Prepare Your Motorcycle
Before you start the installation process, you'll need to prepare your motorcycle. Make sure your motorcycle is parked on a level surface and the engine is cool. You'll also need to drain the engine oil from your motorcycle and remove the oil filter.
Step 2: Mount the Oil Cooler
The next step is to mount the oil cooler to your motorcycle. You can mount the oil cooler in a variety of locations, depending on your motorcycle and personal preference. Some common locations include the front of the motorcycle, behind the fairing, or under the seat. Make sure you choose a location that provides adequate airflow to the oil cooler and is easily accessible for maintenance.
Once you've chosen a location for the oil cooler, you'll need to mount it using the mounting brackets that came with the oil cooler. Make sure you follow the manufacturer's instructions carefully and use the appropriate hardware to secure the oil cooler to your motorcycle.


Step 3: Install the Oil Hoses
The next step is to install the oil hoses. You'll need to connect one end of the oil hose to the oil cooler and the other end to the oil filter or oil pan on your motorcycle. Make sure you use the appropriate fittings to connect the oil hoses to the oil cooler and your motorcycle.
Before you connect the oil hoses, you'll need to make sure they're the right length and are routed correctly. You don't want the oil hoses to be too long or too short, as this can cause problems with the flow of oil. You also want to make sure the oil hoses are routed away from any hot or moving parts on your motorcycle to prevent them from getting damaged.
Once you've connected the oil hoses, you'll need to tighten the fittings using a torque wrench. Make sure you follow the manufacturer's instructions carefully and use the appropriate torque settings to ensure a secure and leak-free connection.
Step 4: Fill the Oil Cooler
The next step is to fill the oil cooler with engine oil. You'll need to remove the oil fill cap on the oil cooler and pour in the appropriate amount of engine oil. Make sure you use the same type of engine oil that you use in your motorcycle.
Once you've filled the oil cooler with engine oil, you'll need to replace the oil fill cap and make sure it's tightened securely.
Step 5: Check for Leaks
The final step is to check for leaks. Start your motorcycle and let it run for a few minutes to allow the engine oil to circulate through the oil cooler and oil hoses. Check the oil cooler, oil hoses, and fittings for any signs of leaks. If you notice any leaks, you'll need to tighten the fittings or replace the oil hoses or fittings as necessary.
Tips and Tricks
Here are a few tips and tricks to help you install an aluminum oil cooler on your motorcycle:
- Read the instructions: Make sure you read the manufacturer's instructions carefully before you start the installation process. This will help you avoid any mistakes and ensure a successful installation.
- Use the right tools: Make sure you use the appropriate tools for the job. This will help you avoid damaging the oil cooler, oil hoses, or fittings.
- Take your time: Installing an aluminum oil cooler can be a time-consuming process, so make sure you take your time and do it right. Rushing through the installation process can lead to mistakes and problems down the road.
- Test the system: Once you've installed the oil cooler, make sure you test the system to make sure it's working properly. Start your motorcycle and let it run for a few minutes to allow the engine oil to circulate through the oil cooler and oil hoses. Check the oil cooler, oil hoses, and fittings for any signs of leaks.
- Maintain the system: Make sure you maintain the oil cooler and oil hoses regularly to ensure they're working properly. This includes checking the oil level in the oil cooler, inspecting the oil hoses for any signs of damage, and replacing the oil filter and engine oil at the recommended intervals.
Conclusion
Installing an aluminum oil cooler on your motorcycle is a great way to improve its performance and extend the life of your engine. By following the steps outlined in this guide and using the right tools and materials, you can install an aluminum oil cooler on your motorcycle in no time.
If you have any questions or need help choosing the right aluminum oil cooler for your motorcycle, please don't hesitate to contact us. We're here to help you get the most out of your ride.
References
- Motorcycle repair manuals
- Manufacturer's instructions for the aluminum oil cooler and oil hoses